Humble Gardening

Theres no one size fits all when it comes to gardening in the Santa Cruz Mountains. The medley of microclimates here make for hit-or-miss conditions when planting the season’s garden. At my home, the beautiful and majestic redwoods make for shadier conditions in summer but provide insulation from frost during winter months. Because of this, I have found that I can grow most cruciferous veggies (such as kale, broccoli, and chard) almost year round.

Start by mixing compost into the soil, breaking up any clods of dirt along the way.

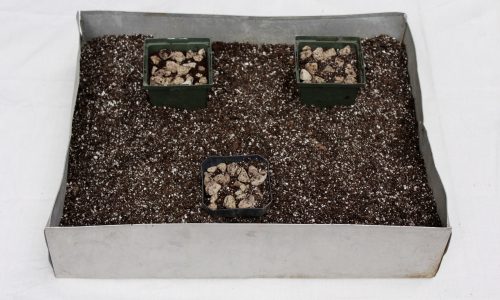
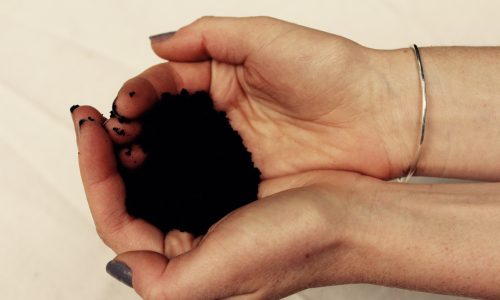
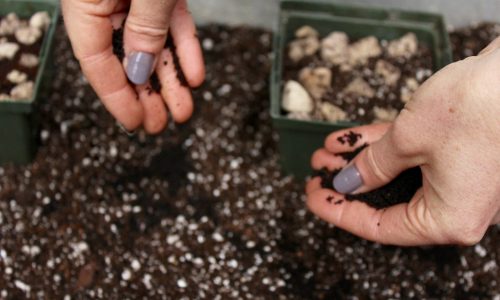
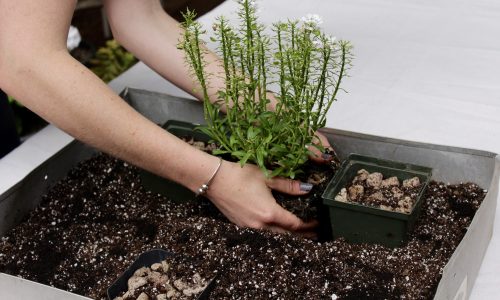
Eager to get started on the year’s spring garden, I planted starters of rainbow chard and triple curled kale in perfect rows and sewed the seeds of french baby carrots and gourmet rainbow beets directly into the soil. I mapped out where my seeds would grow by creating perfectly parallel furrows in my little humble garden. I sprinkled the seeds into the furrows and dreamed that my seeds would soon sprout in rows worthy of a spread in Sunset Magazine.

Always add worm castings to your garden!

Little did I know, a terrible rain storm was making its way to the mountains and in just a few days I was off to Florida to visit my sister, leaving the garden tending solely to my husband. He is a wonderful gardener capable of growing heirloom tomatoes the size of soft balls however, he is a very busy man and Im sure my little garden was the last thing on his mind.

IMG_6716

With family vacation on the mind, I had placed my little spring garden and any control I had on a back shelf where it collected a weeks worth of dust. I had no control over this storm or the damage it would do to my perfect rows so I sent my worries away and wondered what beautiful mosaic pattern of sprouts I would return to.

Ten days of visiting paradise on the East coast served me well. I packed my bags, took some last minute photos, and was soon on the journey across the country back to my home in California. From 30,000 feet above, I could see the perfectly measured patchwork of farm fields butting up to horizon in the distance. As we approached San Francisco Airport, the land became dotted with buildings and the patchwork of the city soon took the lead role.

IMG_8258

My husband swooped me up from baggage claim and off we were, back to our own paradise in the Santa Cruz Mountains. As we drove further away from the city, the tall buildings evolved into 200 foot coastal redwoods. We pulled into the driveway of our quaint home and walked up the 40 steps to the front door.

IMG_8252

I was sure that the garden was going to be barren soil having lost every seedling to the storm. I took that last step that offers the front and center view of the garden, I dropped my bags, and was amazed that the garden had held on. There it was, my little spring garden, greeting me home.

IMG_8262

Since I was a child I have always been amazed at what a single seed can blossom into. The garden grew and it grew beautifully despite being battered by a storm. Now is harvest time. I also let some chard bolt and harvested the seed for next year’s garden.

These determined little seeds have inspired me. Planting a seed both physically and figuratively can create a transformative change in the world. Have you planted a seed yet?

Tell us about it and tag us on Instagram at @humble_tree_co

DIY: Chalk Paint

With summer right around the corner, now is the perfect time to start marking off those DIY items you’ve had on your to-do list for ages. There’s something empowering about giving new life to an old piece of furniture with a simple fresh coat of white chalk paint.

I found this stepping stool under some leaves in my yard, cleaned it, painted it, and now it lives next to my couch as a side table.

I use white because it’s timeless, classic, and complements my home decor in every room. Homemade is always better in my opinion so this week’s DIY will explain how to make your own chalk paint.

You’ll need these things:

1) 1 1/4 cups of latex paint (I use matte finish but any will do)
2) 1/2 cups of hot water
3) 1/2 cups of Plaster of Paris
4) An old tupperware container or jar (preferably one with a lid so you can cover it between coats)

Here’s how to make it:

1) Mix the hot water and Plaster of Paris together until completely smooth.
2) Slowly stir the paint into the plaster water making sure the mixture has no clumps or dry parts. And that’s it!

This recipe has been used on most of my painted furniture. After two coats of chalk paint has dried, I distress the edges of my pieces with either steel wool or a fine grained sand paper. I don’t like to use a finishing wax but you can. I like the look of naturally seasoned furniture that wax often prevents. Wear and tear only gives the piece more character.

If you use this recipe, tag me on Instagram with photos (@humble_tree_co).

We’d love to see what you have created.

Flea Market Treasure Hunt

Weekend flea market therapy is a must after a long week. On this particular Saturday morning, the sun was high in the sky, and so were the spirits among fellow treasure hunters. Now that spring has sprung and the weather is warming, the number of venders has increased three fold. More venders means more possible treasures to find. Heres some of my favorites of the day:

IMG_6994

IMG_6997

I love oil paintings. The elevated brush strokes speak to me. These paintings came from a vender that sells treasures from unclaimed storage units. The seller said his daily life is just like the show Storage Wars. That would be fun.
IMG_6984

IMG_6986

IMG_6985

I tend to gravitate toward treasures that have patina, rust, or dirt. To be more precise, I gravitate toward items that have a story to tell. I’m no stranger to admiring one vender’s items for some time to find the perfect piece with an interesting history. This vender had some really interesting treasures from decades across the board. Unfortunately, the seller was in an unbreakable conversation with a fellow hunter. However, I didn’t dare leave without quickly asking if she’d be back next week. Yes was her answer so yes, I will ask her for the stories in due time. Until then, enjoy these:

IMG_6723

IMG_6721

IMG_6726

IMG_6720

IMG_6719

Do you have a local flea market that you love?

Tag me on Instagram (@humble_tree_co). I would love to see what treasures you have found.

DIY: Tiny Memorial Garden

With Memorial Day right around the corner, I wanted do something to honor those that have sacrificed their lives for our freedom. Every few years my birthday falls on this solumn day and this year happens to be the year. On the years I share my birthday with Memorial Day I am reminded that the celebration of birth is just as important as celebrating the lives of the fallen.

Here’s how I made this tiny memorial garden:

1) The second I picked up this rusted and battered old tin at our local transfer center I knew exactly what I was going to use it for. It was once part of an old movie theater popcorn machine but now it will be given a new life.

IMG_7559

2) I placed small pots filled with stones (for stability) where my jars will soon go.

IMG_7560

3) The I filled in the rest of the tin with potting soil.

IMG_7562

4) I use worm castings for all of my plants. It’s nutritious, natural, and cost next to nothing for what magical properties it offers.

IMG_7564

5) Sprinkled a good handful of it into the soil and mixed it in.

IMG_7565

6) Gently remove your potted flowers and don’t forget to tease the roots if they look root-bound.

IMG_7573

7) Dig little holes where your plants will go and place your plant of choice into it.

IMG_7569

8) I chose red, white, and blue flowers just for the occasion. Make sure to design your planter with foliage that requires similar light and water requirements.

Riviera Sky Blue
Riviera Sky Blue
Double red
Double red
Purity flowers
Purity flowers

9) Place your jars in the garden, cover the exposed soil with mulch, and add some burlap ribbon to dress up the tin.

IMG_7558

The candles in these vintage blue jars will wait to be lit for the big day. On that day my husband and I will enjoy a delicious homemade dinner with the tiny garden as a centerpiece on our outdoor dining table.

IMG_7589

I can’t wait.
Do you have a Diy project that you want to share?

Farmer’s Market

IMG_6943

There’s something sweet about our local year-round farmers market held in the heart of Santa Cruz, Ca. Theres nothing I love more than to hand choose freshly harvested fruits and vegetables strait from the farmer’s weekly harvest.

IMG_6948

The people interlaced within our weekly Wednesday market are a part of something greater than just shopping for groceries. These people are supporting small businesses and choosing to eat the season’s offerings.

IMG_6954

Despite the hustle and bustle feeling characteristic of the twenty-first century, the smiles, conversations, and the act of mindfully choosing produce perfectly capture a feeling of calmness and gratitude.

IMG_6958

I gather the day’s treasures in reusable cloth bags, pack up, and head home to make a delicious salad from today’s picks.

IMG_6931

With every bite, my husband and I internally thank the farmers for giving us the nutrition they grew for us from seed.

IMG_6981

Thank you to all the organic family farmers out there who put the care and love into their harvest.

I can’t wait until next week’s market.

DIY: Rustic Crate Shelf

Never giving up on a task at hand is key to seeing the finished product. My home is full of old historically rich pieces and items that spark pure joy. Living in a small home is fun and has immobilized my creative juices for design and organization. The tiny entryway to my humble house needed a piece with a width no bigger than 10 inches, had an elegant but rustic farmhouse/industrial style, and provided enough storage for my plethora of gardening and health books. I finally came up with the plans for this piece and took a day to get the supplies.

IMG_6693

I started with four wooden crates that you can find at Jo-Anns or at your local craft store. I fastened two together with a wooden support on what would be the underside of the shelf. (Update: Add more support if you are putting heavy items on the shelf)

IMG_6698

The wooden pegs came next. I predrilled holes where I wanted the pegs, coated the screw on the peg and the predrilled hole with wood glue, and hand screwed them in.

IMG_6701

Using a sheetrock shaping tool, I scuffed the edges of the crates and created some wear and tear, making the piece look well used and well loved. Then the staining began. I stained it with “Special Walnut” wood finish by Minwax, putting a little extra in the crevasses and scuff marks I created.

IMG_6699

I left the top crates unattached to the two base crates for versatility.

IMG_6700

Finally, after a day of curing they are ready to come in!

IMG_6703

Done and good. See where a little determination will take you.

IMG_8693 2

Do you have a DIY project you would like to share?